Archive for the ‘Renovation Info’ Category
Expect excellence, not perfection
Friday, November 27th, 2009Top grades for a smart house
Sunday, November 22nd, 2009TECHNOLOGY: Program lights, heating, air to reduce energy use
MIKE HOLMES
Province
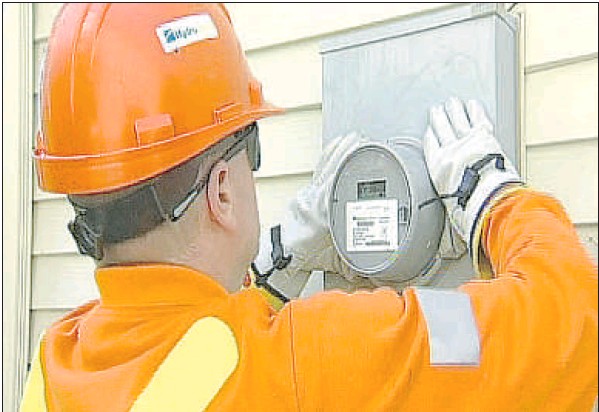
A smart meter allows homeowners to save money on their electricity bill by avoiding usage peak rate.
Is your house smarter than you? In some ways, it probably already is, and building technology is developing all the time to improve on that intelligence. Your house is a system, and all the parts work together. In fact, many or most of its parts already work without your even knowing how they do it.
Like your HVAC system, there’s a thermostat that reads the temperature in the room and sends a message to the furnace or the AC unit to heat or cool the house, depending on your requirements. Programmable thermostats can be set to come on so your home is warm when you arrive home from work.
You put lights on timers when you go on vacation, you might have a coffee maker that has a fresh pot ready when your alarm goes off in the morning.
What if your house was so smart that you could set all that up — and more — remotely, through an Internet connection or with your cellphone? A smart house allows you to control your home’s heating, ventilation and air conditioning remotely. It allows you to turn lights on and off, or dim them, and manage your energy use, saving money and reducing energy consumption.
What if your house had a smart meter that showed you the actual time-of-day price of the electricity you were currently using, so you can make an informed choice about your energy use?
Energy costs more during peak times, but consumers aren’t aware of how much they use during the expensive times since their usage is typically calculated on a monthly basis. A smart meter shows actual current usage — real time information — about the price of electricity so you can “talk to” and program your house based on what you know.
A smart meter will tell you how much energy you are using, in what rooms and on what appliances you are using it, how much it’s costing you, and how much you could save if you made different choices.
It’s long overdue that we have a meter that helps consumers manage their energy consumption. But for a house to be really smart, I think we need to do more. We need to make more intelligent choices about where we are getting that energy in the first place. A smart meter is (so far) all about tracking energy consumption from the grid.
The technology is available — it has become more and more affordable, with a shorter payback time. There is geothermal, wind and solar power with battery back up. There are even electric cars. Get off the grid as much as possible.
What if you incorporated solar or wind technology to help offset what you use from the grid? What if your house was smart enough to know when electricity was costing you more, and could choose instead to use backup power stored in batteries? What if it could take advantage of the higher peak prices of power to sell it back to the grid — in effect making you money? Now that’s a smart house. Catch Mike in his brand new series, Holmes Inspection airing Thursdays at 8 p.m. ET/PT on HGTV. For more information visit www.hgtv.ca
Like some sawdust in your eggnog?
Sunday, November 15th, 2009HOLIDAY RENO: It
Get your roof in shape!
Sunday, November 8th, 2009ACT NOW: By winter, it may be too late and too tricky
MIKE HOLMES
Province
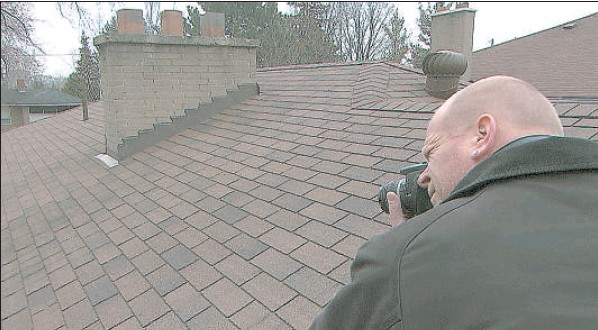
Weak spots in your roof will be tested more in fall and winter — and that’s the worst time of year for someone to be working up there, so be sure your roof is in good shape now. — HANDOUT PHOTO
Fall is the rainy season and the time of year you need to make sure your roof is in good shape. I don’t want to think about it, but winter is on its way with snow and ice, freeze and thaw cycles and strong winds. Obviously, your roof protects your home year round, but in the fall and winter any weak spots in your roof will be tested. And, when the temperature drops it’s the worst time of year for someone to be working on your roof — assuming you can find anyone who’ll do it — so make sure your roof is in good shape now.
You roof gets worn over time, and through exposure to sun, rain, snow, wind and debris. And, it might look OK from the ground, but without a professional taking a good close look at it you won’t necessarily know what shape it’s in. They assume it’s fine. But wishful thinking won’t keep you dry.
Most homeowners notice they’ve got a problem with their roof when they have a leak. Whether it’s just water stains on the ceiling or a full drip, the source of the leak can be hard to find. Water can travel horizontally along the underside of the roof sheathing or along roofing boards, and drip through to your home far from where it’s getting through your shingles.
You need to understand that your roof is a system — all the parts work together. From the exterior surface — the parts that most people think of first — to the underlayment, to the flashing and the sheathing, all parts of the system need to be in good shape for the roof to stand up to what the weather throws at it.
Most roofs have some slope. They are pitched so the water from rain hits the surface, and flows down the slope to the gutters, where it’s taken away. Depending on the degree of pitch, some roofing materials are more appropriate than others — you wouldn’t use standard shingles on a low-pitched roof, for example.
Certain roof types have more problems than others. I find that a low-pitched roof is more likely to have problems with ice dams, since there is less room beneath the roof sheathing for insulation.
In general, the steeper the pitch of your roof, the longer it will last, because water and snow load will be shed more quickly. On a low-pitched roof, the snow will probably sit longer, melting and re-freezing, and having more time to get through to your house.
Most roofs are covered in asphalt shingles — not that they are my favourite roofing choice. The shingles are overlapped with each shingle partly covering the one under it, so the water flows down from one shingle to the next. They are also staggered so the seams between the shingles don’t line up and let water get through the crack and find its way to the roof sheathing.
A leak occurs when water somehow penetrates the roof’s first layer of protection: the shingles. Maybe some shingles are damaged or missing. Or, maybe an intense rainstorm with high winds will drive the water up behind the shingles.
That’s why your roof system has a backup under the shingles: the underlayment. Traditionally, black felt roofer’s paper is rolled out onto the surface of the sheathing, and depending on your local building code and climate, a three-foot piece of ice and water shield is laid along the bottom perimeter of the roof. I prefer to use ice and water shield all over, and think it’s well worth the extra money you’ll spend.
Think about how your roof is installed: the shingles are nailed onto the roof sheathing. Thousands of nails, all over your roof’s surface, penetrate the shingle and the sheathing.
Every one of those nails is a spot where water can trickle down and drip into your attic space. That’s one reason ice and water shield is a good idea to use all over your roof — it’s a rubberized adhesive membrane, so it’s waterproof, and it seals around the nails much better than roof paper.
You want to make sure water stays off your roof sheathing. Roof sheathing is wood and wood is porous. It’ll soak up the water until it’s saturated, then the water needs to go somewhere.
It will drip, or run along the rafter until it finds a better place to drip. When the rain stops, the drip stops, but the problem remains. Over time, that section of roof that has been repeatedly wet then dry again will rot. It might mould. It could lead to major roof damage.
Check your roof system before the stormy season arrives and a leak finds you.
Catch Mike in his new series, Holmes Inspection, airing Thursdays at 8 p.m. ET/PT on HGTV. For more information visit www.hgtv.ca
Great subfloor, braced joists are the essentials of a good floor
Friday, October 30th, 2009Screws, glue, too! What a builder might miss with a nail gun, they won
Air inside home is often more polluted than outside the house
Friday, October 23rd, 2009The denser the furnace filter the smaller the particle it will clean from circulating air
MIKE HOLMES
Sun
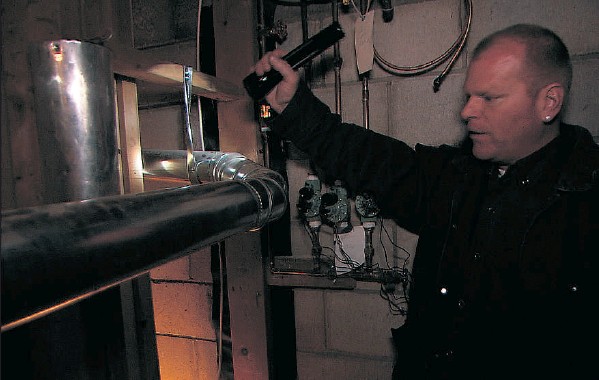
Mike Holmes checks out a customer’s furnace an essential part of improving home air quality.
Every furnace has a filter installed at the cold air return duct that filters the air returning to the furnace from the house.
Would you believe the air inside your home is more polluted than the air outside — in some cases 100 times dirtier?
And that new homes usually have poorer indoor air quality than older homes?
Newer homes are designed and built tighter to increase energy efficiency and reduce air leakage.
That’s great in terms of saving money, but we also trap everything in the air, like the VOCs (Volatile Organic Compounds) that off-gas from furniture and building materials, mould, allergens, pet dander and dust mites and the residual odours from cooking and pets.
And that bad air can lead to allergic reactions and health concerns.
We need to make sure the air in our homes is as clean as it can be — and that means removing as many pollutants, such as particles and gases, as we can.
Particles are made up from dust, pollen, pet dander, soot from smoke, dust mites and mould spores.
Gases come from VOCs and from the combustion of stoves, fireplaces and furnaces.
Every furnace has a filter installed at the cold air return duct that filters the air returning to the furnace from the house.
This does remove some pollutants from your home, but it’s really designed more to protect the furnace from dust and dirt buildup on the heating coils and fan motors.
It will also help clean your indoor air to some extent — usually collecting larger particles.
The design and density of your furnace filter will determine how many, and what size, of the particles it will collect.
The denser the filter, the smaller the particle it will capture.
Air filters need to be changed frequently, or they can’t do their job.
It is very important to make sure you only use the filter that is designed for your HVAC system.
Many residential HVAC systems don’t have enough fan capacity to accommodate high efficiency filters and you may restrict air flow and affect your furnace’s efficiency.
A much more effective way to clean your indoor air is to install a HEPA ( High Efficiency Particulate Ar – restance) filter.
HEPA filters also trap particulates, just like your furnace filter, but they will capture particles of a much smaller size.
HEPA filters alone remove 99.7 per cent of particles in the air, but they don’t trap gaseous pollutants like VOCs.
But, you can’t just put a HEPA filter into your mid-efficiency furnace, as a replacement for your standard foam or pleated furnace filter.
True HEPA filters are typically installed only in homes with HVAC systems designed to accommodate the airflow they require.
You can buy free-standing HEPA units that are used separately from your HVAC system, and make sure you have one on your vacuum cleaner.
Cleaning VOCs, gases and odours from your air requires an activated carbon filter.
These absorb airborne chemicals and gases, but not particles.
Carbon filters are designed for specific gas pollutants so they don’t get everything in the air, just those they are designed for.
No filter gets every gas. Carbon monoxide is one gas that will not be captured by any indoor air cleaner — you need a carbon monoxide detector and alarm for safety.
Depending on your home and the kind of pollutants you produce, the lifetime of your activated carbon filter can vary.
The filter medium gets saturated and needs to be replaced promptly, or the filter won’t be able to do its job.
That’s why you’ve got to do your job, and make sure you change the filter.
Another air-cleaning technology uses ultraviolet light to kill bacteria, mould and viruses.
UVC irradiates and breaks down micro-organisms by disrupting their molecular bonds, making them unable to reproduce and ineffective — that way it “kills” or neutralizes them.
UVC is very effective at sterilizing air; it’s been used in hospitals for years.
It also needs to be used with a particle filter, like HEPA, because even a dead mould spore can cause an allergic reaction.
UVC lights are installed inside the ductwork or your HVAC system.
Since they are light bulbs they are going to accumulate a coating of dust over time so they’ll need to be replaced periodically.
The bulb will also lose intensity over time, and you’ll need to replace it according to the manufacturer’s directions.
The effectiveness of the UV light depends on how intense it is — some systems coat the interior of the duct around the bulb with mirror to increase the intensity — and on the wattage of the bulb.
How long the micro-organisms in the air are exposed to the light is also important.
So, if your airflow is very fast, the exposure time will be shortened, and the effectiveness reduced.
Catch Mike in his brand new series, Holmes Inspection airing Thursdays at 8 p.m. ET/PT on HGTV. For more information visit www.hgtv.ca
Can your fan take the heat?
Sunday, October 18th, 2009VENTILATION: Make sure exhaust fan is right size for your kitchen
MIKE HOLMES
Province
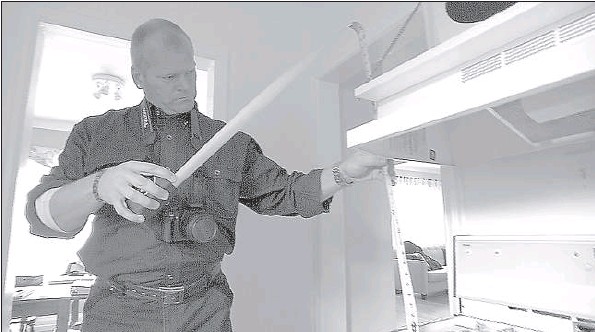
The kitchen cooker fan needs to be close enough to the stove to efficiently extract air and moisture. — SUBMITTED PHOTO
Your stove — whether it’s gas or electric — needs to have an operating hood and extraction fan over it. These hoods aren’t just decorative — they are essential to help control excess moisture in your home, as well as to help remove cooking odours.
These ventilation systems have an exterior hood — the decorative part that hides the works — and an exhaust fan and ductwork to extract the air, smoke and moisture. Obviously, they need to be over the cooking area — and ideally they should extend out over the stove’s surface area. They need to be close enough to the stove to efficiently extract air, but not so close you can’t comfortably cook. If they are too high up, like many “designer” hoods, they aren’t doing a very effective job.
Your kitchen exhaust fan really needs to be discharged to the outdoors — that’s ideal. Never exhaust into the attic or soffits or crawl space. I’ve come across situations where the kitchen fans actually vent into the attic space; this is a really bad idea — for lots of reasons. First, the last thing you want to do is allow hot, moist air up into your attic space, especially in winter. It will lead to ice dams, mould, rot and a world of trouble caused by condensation.
Second, if you ever had a fire on the stove, the exhaust fan could pull the fire into the attic, and allow it to quickly spread through the house.
The ducting should be smooth, with a short, straight run to the outside, with as few bends and angles as possible. This will help with your fan’s efficiency in moving the air out. If the run is very long, you might need a bigger fan — check with a pro. The joints need to be sealed, and if the duct runs through an unheated space, they should be insulated. If they aren’t, condensation might form on the duct.
Kitchen exhaust fans come in different sizes — and need to be appropriate for the size of your stove and house. It’s very important that you get the correct size of ventilation fan for your kitchen. It’s not as simple as “bigger is better.”
Not only will your utility bills be higher than they need to be because you are running an oversized fan, you are also exhausting larger amounts of heated or cooled (depending on the season) air from your home. And that’s air you’ve paid to condition, which will affect the energy efficiency of your home. A fan that’s too large will create air infiltration and compromise the building envelope.
A much more serious problem, if you have installed an exhaust fan that’s too big, is that you can cause depressurization, which will lead to backdrafting. Backdrafting happens when exhaust fans pull the gases from combustion back into the house. These gases are the byproduct of fireplaces, hot water heaters, furnaces—any combustion appliance that is vented to the outside — and these gases are dangerous. They can kill you.
Most new homes are pretty airtight — that’s one of the reasons we have such few problems with indoor air quality and mould growth in new homes. Airtight homes have mechanical ventilation systems, like heat-recovery ventilators, to provide a fresh air supply. If you don’t have replacement air coming in, you’ll risk creating negative pressure (backdrafting), but also your fan will be starved for air and won’t even work properly to do the job you’ve installed it for.
If your HVAC system — including the kitchen exhaust fan — was designed and installed professionally, the ventilation will have been balanced. There will be the proper amount of air being extracted, relative to what’s being brought in or recirculated in the system. There needs to be dedicated makeup air to replace what the fan might pull out, or you risk depressurization and backdrafting.
If you have any doubt at all about this, get a qualified professional in to check your HVAC (Heating, Ventilation and Air Conditioning) system and the kitchen exhaust, and install a CO alarm in your home (which every home should have anyway).
You often will see recirculating kitchen exhaust fans that don’t expel air to the outside. They pull steam and smoke from the stovetop, filter it and recirculate it through vents at head level. These fans might remove odours, since they usually have a charcoal filter, but they don’t do anything for removing steam.
Don’t forget — boiling water and steaming vegetables creates a lot of moisture in the air that needs to be discharged.
These recirculating fans don’t cause depressurization, since they aren’t vented externally. To my mind, they don’t really remove much odour, or grease, and they blow into your face when you’re at the stove.
They also can be expensive when you need to replace the filters — and so people don’t do so as often as they should, which means they don’t work well at all. I really believe you need to have your kitchen fan exhaust outside.
Catch Mike in his brand new series, Holmes Inspection airing Thursdays at 8 p.m. ET/PT on HGTV. For more information visit www.hgtv.ca
Time to lighten up in the kitchen
Sunday, October 11th, 2009Jane Harrison
Province
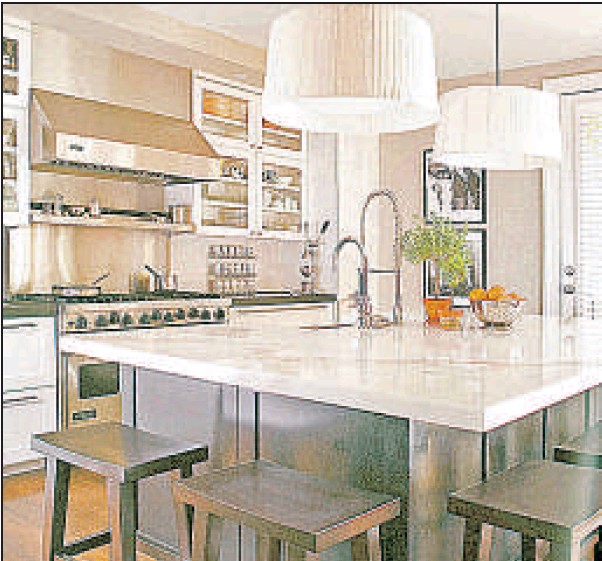
Running cabinets to the ceiling makes them look like part of the wall. — SUNSET PUBLISHING
If your kitchen has you cornered and claustrophobic, it’s time to lighten up. Today, the trend in kitchen design is to replace formidable banks of upper cabinets with open shelves or windows and free up wall space for art — or nothing at all.
“Uppers start to encroach on the feeling of space,” says architect Neal Swartz, who prefers pantry cabinets in their place. When he uses uppers he runs them to the ceiling “so that they feel like they’re part of the wall rather than boxes hanging off the walls.”
Swartz is part of the design panel contributing to Kitchens: A Sunset Design Guide (by Karen Templer, Sunset Publishing, 2008).
“More and more, uppers are disappearing entirely, replaced by open shelving, old-fashioned plate racks, or no upper storage at all,” writes Templer.
Award-winning kitchen designer Beverley Binns, featured on the cover of Canadian Kitchen & Bath (kandb.ca), demonstrates the practical and dramatic impact of this approach.
“The original kitchen was very tight and confined,” says Binns. Her goal was to open the space to create a more inviting workplace for the family. She employed chic, dark base units to blend with the floor and anchor the new design; upper cabinets are white.
All of the above design principles are a boon to those renovating on a budget. The Sunset book displays a kitchen transformed by two different colours of paint on the upper and base cabinets. Doors were left off some of the upper cabinets to create open shelving.
If the kitchen has reasonable lower cabinets, updating the room could be as simple as painting the uppers the same colour as the wall, replacing upper cabinets with open shelves or simply removing the doors from them before refinishing. With careful selection, the mix-and-match approach also allows you to replace just the upper cabinets rather than all of them.
Lighten up your kitchen to create a stylish, convivial space to welcome family and friends — or just cheer up the cook.
© Copyright (c) The Province
Pay attention to the state of your attic
Sunday, October 11th, 2009PROBLEMS: Insufficient insulation, ventilation are all too common
MIKE HOLMES
Province
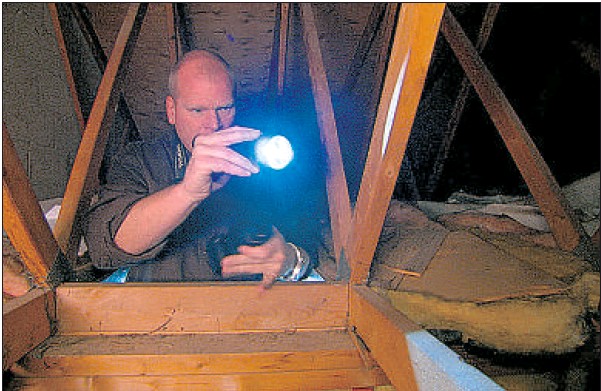
Mike Holmes says to always check the attic, even if a voice inside your head keeps saying “Don’t go in there!” — SUBMITTED PHOTO
What’s in your attic? Usually when I have to stick my head up through an attic hatch to inspect the space, I get a sense of dread. It’s like I’m in a horror movie and there are monsters in the attic. It’s easy to see warning signs of attic problems without going up there — ice dams, roof damage, water dripping from soffit vents, ceiling stains. But just like the guy in the horror movie, I still have to look inside, even though a voice inside my head is saying, “Don’t go in there!”
What’s in your attic? If I looked in there, I hope I’d find insulation. I hope there’d be enough vents. I hope I wouldn’t find: mould, wet insulation, dirty insulation, vermiculite insulation and/or no insulation, animal or bird droppings, blocked or non-existent vents, or kitchen and bathroom exhaust fans venting into the attic. But believe me, I’ve found them all.
Of the many problems you can find in an attic, most are caused by inadequate insulation, insufficient ventilation and air movement — and the last one is the most damaging.
You have to have enough insulation in your attic. You really can’t have too much unless you’ve put in so much that you are actually touching the underside of the roof or blocking the venting. Insulation is necessary to prevent or slow the transfer of heat from one area of the house to another — like from your living room into your attic and out the roof.
You can use a number of different materials like fibreglass, blown-in cellulose, spray foam, rigid foam, batt insulation even recycled blue jeans. Insulation will help reduce heat loss, and improve the energy efficiency of your home.
Your attic also must be ventilated. If it isn’t, any moisture or water vapour that is present in the space can lead to serious problems, like mould or rot. A lot of moisture from everyday living — from showers, laundry, doing the dishes — will rise into the attic along with the warm air it’s carried by. Once there, condensation will occur.
Condensation can soak your attic insulation, destroying its effectiveness. In winter, the warm, moist air sneaks into the attic, where it’s cold or freezing, and frost forms on the underside of the roof. Sometimes homeowners have what they think is a leak in the roof, because there’s moisture or staining on the ceiling of the room below. There may be mould on the underside of the roof sheathing, rafters, or trusses. The plywood sheathing may rot out altogether in time.
You definitely need roof vents — either soffit vents (make sure they aren’t covered by insulation), a ridge vent, or a turbo vent. All vents should have screens to prevent wildlife from getting inside. Check with a professional roofer for how many vents you need, given your roof’s size.
Roof vents move hundreds of cubic feet of hot air and moisture out of the attic.
But, if you do have condensation problems in the attic, increasing ventilation by adding more vents might not be the answer. Too much venting will suck even more warm, moist air out of your living space and into your attic where not only are you wasting heat, you are creating more condensation.
The most important thing to do to prevent attic problems is to properly seal the attic, and prevent air movement between the warm and cold zones of your house. If you prevent the warm moist air from flowing into the attic where it will inevitably condense, you likely won’t see problems with moisture and mould.
Make sure your attic has plenty of insulation and good ventilation, but most important try to minimize or eliminate air movement. You can sometimes see evidence of air movement if the insulation is dirty in specific areas. Check the vapour barrier for leaks and seal them. Seal around the attic hatch. You can often find leaks around penetrations like plumbing stacks and light fixtures.
Catch Mike in his brand new series, Holmes Inspection airing Thursdays at 8 p.m. on HGTV. For more information visit www.hgtv.ca
The right contractors and tradespeople can make renovations virtually pain-free
Friday, October 9th, 2009When it’s time for a change, take the time to find the right people, materials and design
Mia Stainsby
Sun

Neighbours Nathan Clement (left), Kenny Clement and Maurina Clement enjoy cupcakes on the granite countertop in Mia Stainsby’s newly renovated kitchen. Photograph by: Ward Perrin, Vancouver Sun
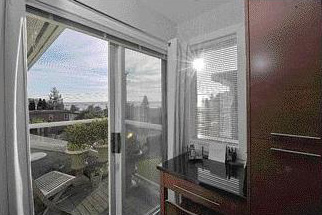
The breathtaking view from the kitchen over Stanley Park and the ocean. Photograph by: Ward Perrin, Vancouver Sun
About a year ago, a sledgehammer smashed through our kitchen wall ending our renovation paralysis. We’d survived a largely DIY reno in the early ’90s but during that reno, vultures circled our marriage, hoping for reno-kill.
My partner’s a patient, detail-oriented guy; me, I’m more like the bulls in Pamplona. We’d need a referee with whistle and rule book at all times if we were to bring out the power tools again. At least this time, invisible elves would do the reno while we were at work.
Our kitchen was serviceable, but nothing special and quite cramped for space. My life as a restaurant critic meant I ate out a lot and at home, we were always in recovery mode — we tried to eat lean and mean and simple. But it was time for a makeover.
In these leaner economic times, I cut my reviews to one a week from two and I was eating out far less and enjoying cooking at home more. And I noticed how appliances were dated or on the brink of extinction. My birch floors had been attacked by a falling knife more than once and our dishwasher kind of threw up on it once, leaving it gap-seamed. The counter was cluttered with blender, espresso machine, coffee maker, food processor, knife rack, and stand mixer — eyesores all.
The best reason for a reno, though, was an unbelievably ignorant wall, blocking off a view of the water and Stanley Park. (Our house has a reverse plan with living space on the second floor.) In summer, cruise ships sail through our yard, or so it seems. The wall enclosed the kitchen from an otherwise open plan. There was also an area meant for a kitchen table when the dining area was just a few steps away.
We wanted to have the kitchen merge with adjacent hallway, family, dining and living rooms. There would be a clear view from everywhere. Light from the stairway skylight would flow into the kitchen, too.
If you’re rubbing your hands, anticipating roller coaster tales of contractors from hell, financial catastrophe, long delays, marital strife, tears and rage, so sorry — there were no psychos on this reno, no desperate calls to Mike Holmes, no disappeared trades people, no screaming matches. Eerily, it was smooth sailing. It helped that we went with a contractor and tradespeople who came recommended by friends.
Even when we totally expected damage, there was none. For example, when the granite was delivered, we expected to come home and find the stair rails ripped out and gaping holes in the wall. The granite for the kitchen island is nine feet by four (we went with Absolute Black) had to be delivered in one piece. The wall counter is just as long but half the width. Do you know how heavy granite is? I went to lift a 2-foot-by-2-foot piece of granite and I might as well have tried to lift a monster truck. Six men, like human mules, had lugged the granite up the stairs and both of the pieces were in place when we got home. There might have been one small nick on the wall but nothing else, except, perhaps for six hernias and burst blood vessels.
I had agonized over the counter surface, considering granite, engineered stone, Corian and marble. I lo-ove white Carrera marble but soon learned it’s a high-maintenance diva. Consumer sites on the web had unending debates as to whether granite, engineered stone or Corian was most dependable, but nothing definitive. In the end, granite seemed to be the toughest and I liked that it was real stone.
The biggest upset was our — correction, “my” — fault. During the reno, our pampered custom-made dining room table became the temporary kitchen with microwave, coffeemaker and countertop convection oven on it. I had put layers of protection and cork-based placemats under them but when the kitchen was done and we peeled back the tablecloth and underlay, I was shocked to see a large white map of the Soviet Union emblazoned on the black surface and another, that looked like Australia. It was from heat and steam from the appliances even though I had Pimpernel placemats under them and layers of thick fabric. In the furniture biz, it’s called clouding.
I tried something I’d heard about — rub mayonnaise on the “clouds” and the colour might return. (I didn’t, however, experiment with another “solution” to put a cloth over the clouding and go over it with a steam iron.) With the mayo, Australia sort of disappeared but still was a phantom ghost. The Soviet Union stayed so I went for broke and wiped some black stain over it, then semi-gloss urethane. In the end, of course it was a mess. We took it back to the furniture maker and had it refinished and it looks gorgeous again. Lesson learned: the more expensive the table, the wimpier it is. As I learned, it’s only happy with felt atop its surface like Kate Moss is happy with $200 face creams and nothing above a tepid temperature.
With the makeover, we have large charcoal tiles on the floor, charcoal glass tiles on the counter wall (although I’m thinking that’s where I should have put the Carrera marble), black granite counters and cherry-stained cabinets. When we have company, people still gravitate to the kitchen as I cook, but now, they stay on the other side of the island (previously they’d have been behind a wall standing there).
I learned that when it comes to design, expert advice is not the end all, be all. I declined a designer’s advice and am glad I did. I wanted lots and lots of storage but she didn’t want the pantry or cupboards over the counters. She suggested a smaller island across from the dining room. I wanted big. Another designer suggested a peninsula between the kitchen and family room as well as the island. My cabinet maker wanted to put handles on the six doors on the stair side of the island but I wanted it to look doorless with spring-loaded hardware where you just pushed the corners to open the doors. I did cave to his advice not to put a connecting shelf between cupboards over the sink and I’m sorry I did.
Since it’s totally an open plan now, I had to do something about the mess that accumulates during dinner parties. A large stainless steel trough sink swallows up all the pots and pans and could bathe all of Jon and Kate’s kids.
Now that our kitchen walls has been sundered, I feel discomfort. I have the uncomfortable feeling I hopped on the trend caboose, bringing up the rear, that style makers are ready to pronounce the death of open plan designs. Please say it ain’t so!
© Copyright (c) The Vancouver Sun
